When my friend, Sydney based photographer Dom Ruikeh aka Refracting Light Photography, told me he was searching for a CONTAX RX of course, I was immediately interested in what he could find. Looking for and finding a good used camera is always an adventure and sure enough Dom's new RX was just that. It was such an experience that I asked Dom if he would like to write about it and show off some of the first shots taken with this brilliant 90s camera.
CONTAX RX Review and fixing the CONTAX mirror-slip issue
By Dom Ruikeh
I have been a long time collector and restorer of Minolta, Mamiya, and M42 cameras and lenses, but six months ago I began delving into the world of CONTAX as a means to use Carl Zeiss glass. Now six months on, I find myself downsizing my collection to fund my growing investment in the CONTAX system. My newest addition is the CONTAX RX, these are my initial impressions of the camera and how I fixed the mirror-slip issue that came with it.
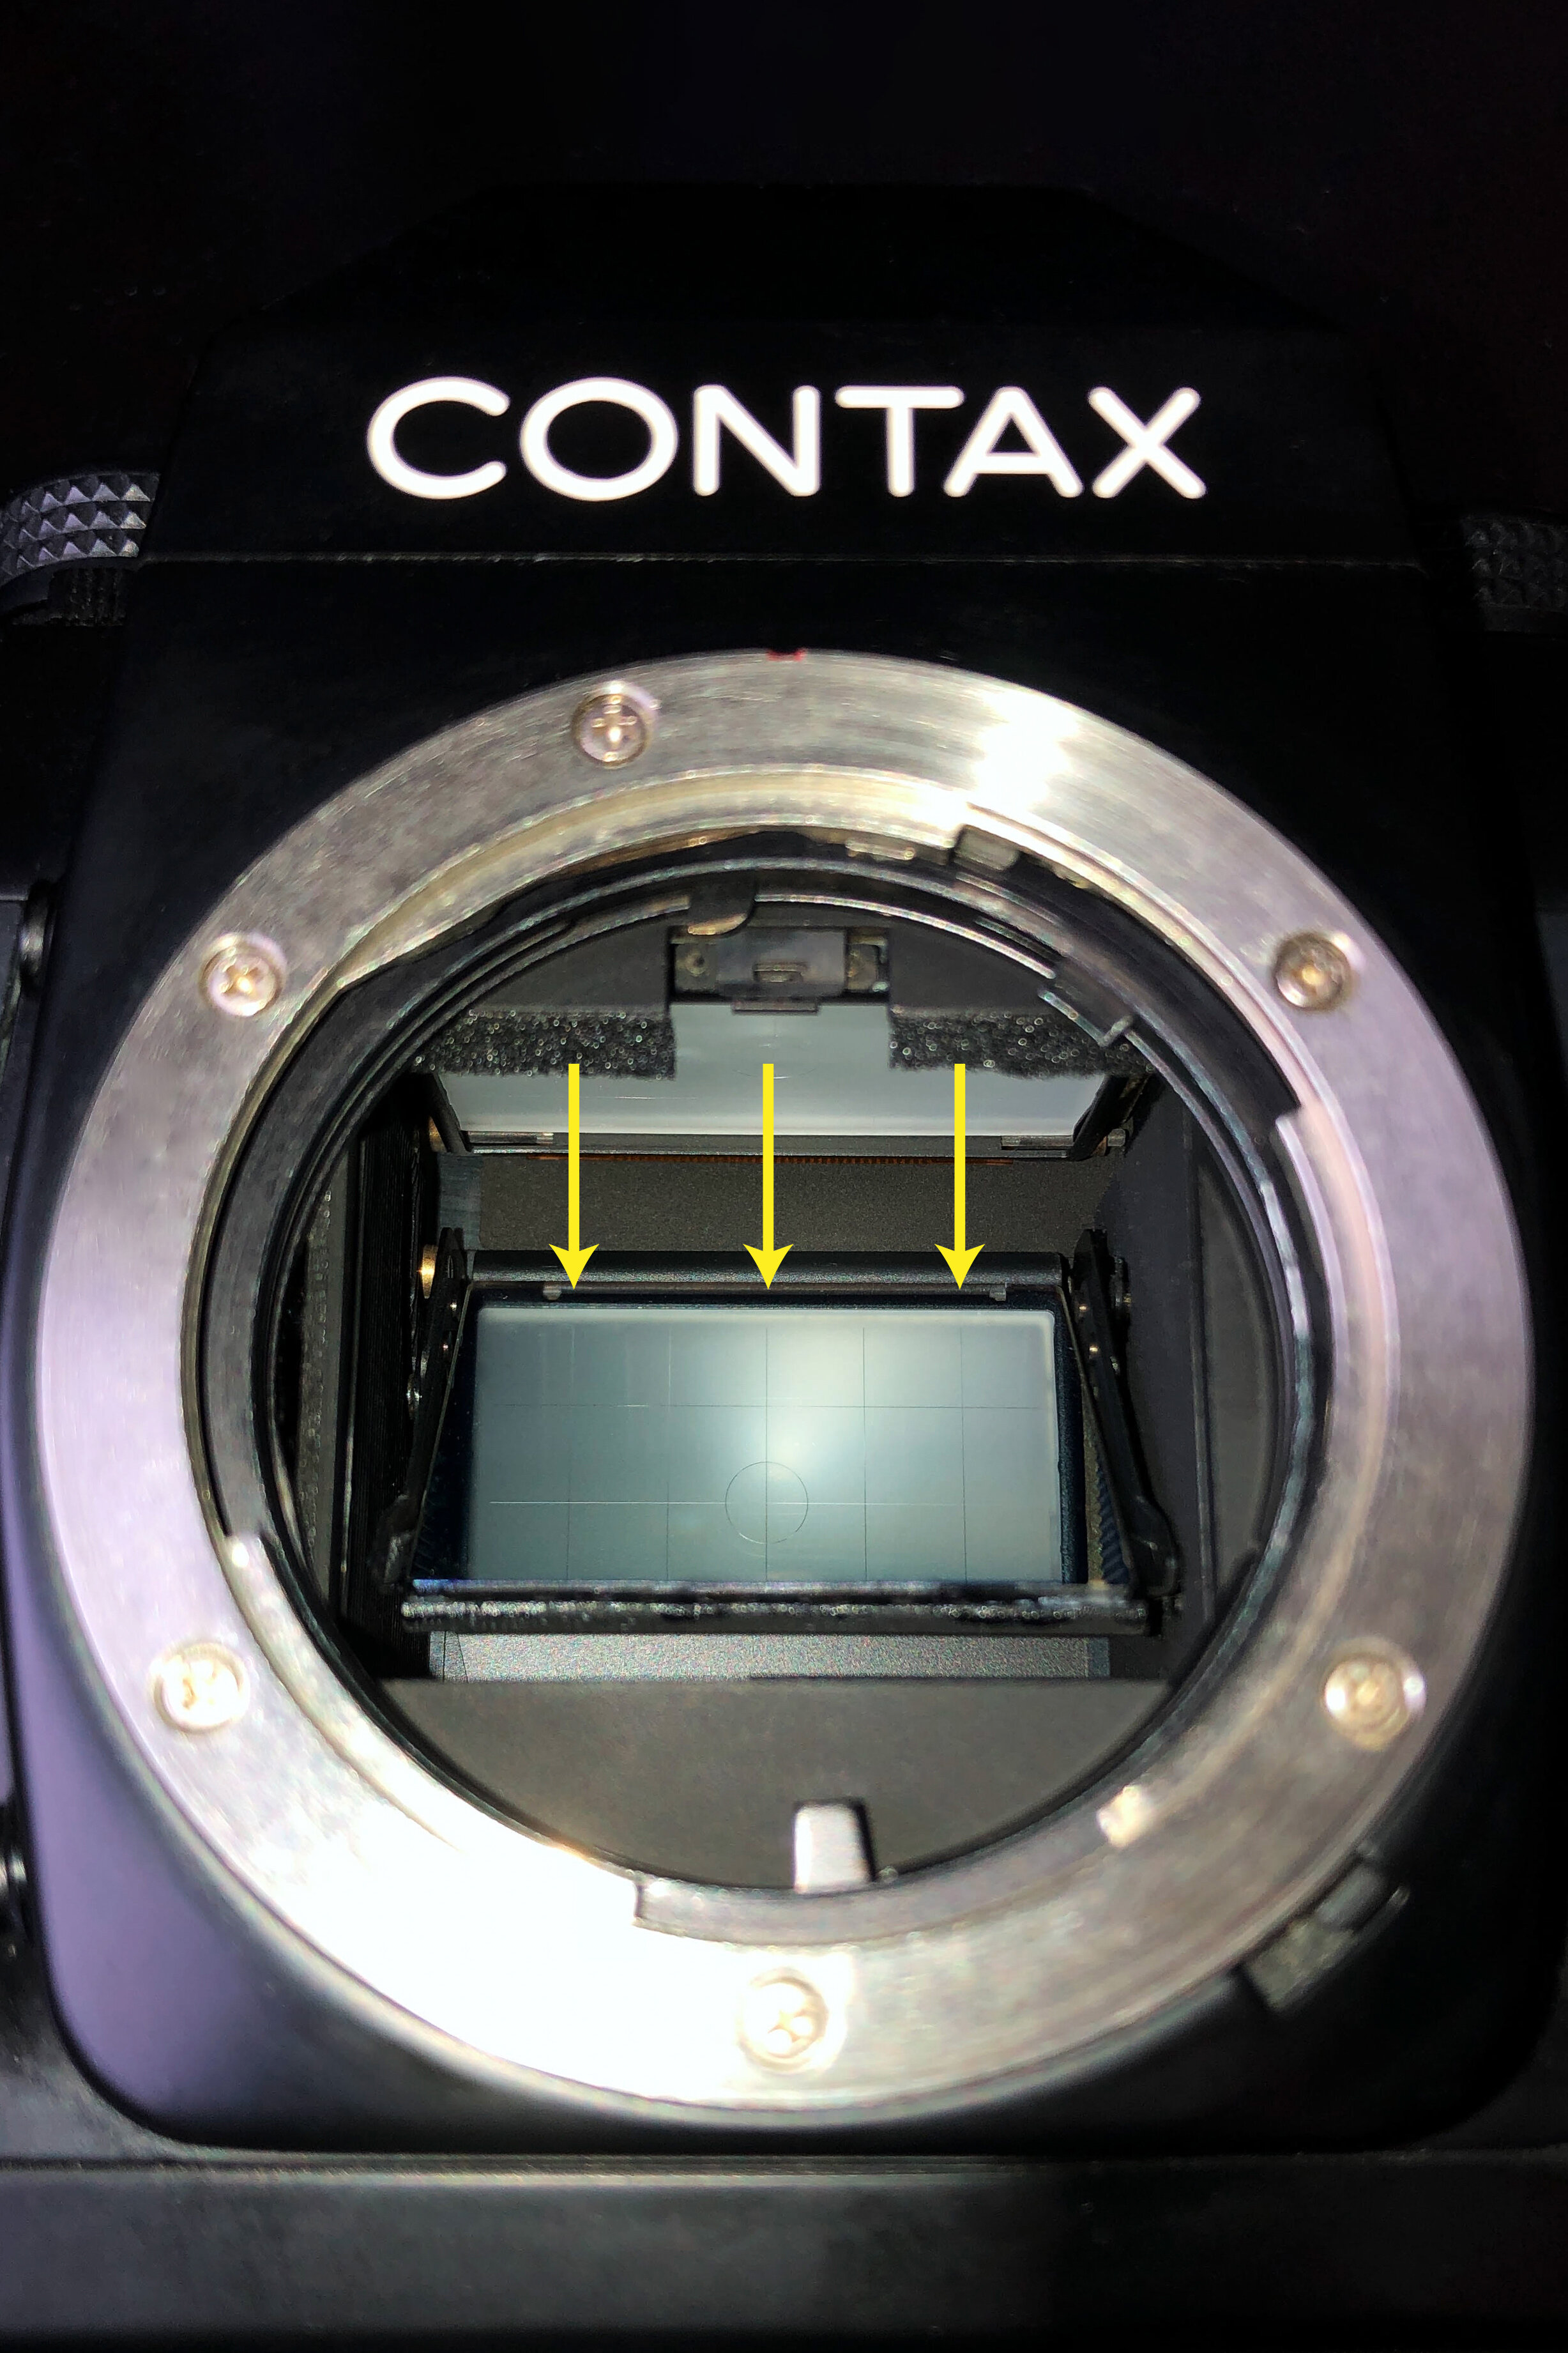
I had been following the prices of the CONTAX RX for a while and when I saw a great deal on a ‘mint’ condition RX on eBay Japan, I pulled the trigger and bought myself an ‘early birthday present’ five months early in fact! but it was my way of rationalizing the purchase to my wife. The camera arrived with record speed and it indeed looked mint, however, my excitement was short-lived when I noted the mirror was not fully opening when the shutter was released. I wrote to the seller about the problem and was pleasantly surprised when they apologized and promptly refunded me the full cost of the camera AND let me keep it to try fix on my own. My birthday present just got a lot sweeter! So before I get into the actual review of the camera, I’ll take a little detour to explain how I fixed what I discovered to be known as the ‘mirror-slip issue’ which can occur in various CONTAX SLR models particularly those manufactured in the 90s.
Fixing the Mirror-Slip Issue
With all the brilliant technology and engineering that went into building these cameras, it was unfortunate that a simple weak link in the production has caused these amazing machines to require this repair. That weak link is the adhesive that was used to fasten the mirror to the camera. Over time, particularly in environments of heat and humidity, the adhesive begins to lose its bond causing the mirror to slip down.
So after spending a few nights researching every repair forum, operating manual, and YouTube video I could find, I discovered there are generally two methods that others have used to try to fix the problem.
The first method involves heating the mirror with a blow-dryer then gently nudging the mirror back into place. This however appears to be a temporary fix, with several users commenting that the mirror slid back down after a few months. In order to make this fix more permanent some have applied sealant or glue to the top part of where the mirror sits flush with the carrier plate, however, there are some reports of the sealant seeping in between the mirror and plate causing discoloration or blotting resulting in dark patches seen through the viewfinder.
The second method involves a razor blade to get under the mirror and cut it from its carrier, then after using a solvent to clean and remove the existing adhesive, reattaching the mirror with double-sided tape. This appears to be the more permanent fix solution, though there is some risk of breaking the mirror.
I had originally decided to use the second method until I read some reports that the electronic focus confirmation of the RX no longer worked after the fix. As the focus confirmation is a key feature of the RX, that risk was enough for me to try another solution. I ended up using my own hybrid solution by first applying a very thin layer of 3M adhesive transfer tape to an area at the back of where the mirror will eventually sit. Then I engaged the bulb setting, keeping the mirror open whilst using a blow-dryer on its highest setting to heat the back of the carrier plate. It took less than 20 seconds of heating for the existing adhesive to become loose enough for me to nudge the mirror all the way up until it hit the back-stop of the mirror support plate, where I had previously placed the adhesive transfer tape. Repair done, I was ready to test my new camera.
Using the CONTAX RX
In 1994, when Nirvana and Radiohead were dominating radio playlists and Forrest Gump was cleaning up at the Oscars, on the other side of the world, in Japan, the CONTAX RX was born. The RX was marketed as the more advanced higher-end version of the 167MT, and it sat below the RTS III model which was marketed to professionals. The RX was one of the last CONTAX SLR models produced by Kyocera, before the company focused more on developing their medium format cameras.
My immediate impression of the camera is how well it sits in my hand. Yes, it’s a chunky beast, and though the spec sheets show the RX is 810g even without battery, the weight is perfectly distributed and has a nice protruding grip which allows me to carry it confidently with one hand. I can’t say the same for the RTS which although is a lot lighter than the RX, feels like it will slip off if I carry it with one hand. The RX however is certainly not a discreet camera and not one I would use for candid street photography, for that I prefer the RTS with Tessar. If I can liken the RTS to a Porsche 911, with its sleek polished lines and compact body. The RX would be the more angular, bigger and heavier Porsche Macan SUV.
The viewfinder is big with 95% coverage and 0.8x magnification. It has a true pentaprism, not pentamirror, for optimal brightness. The simple layout of the dials and buttons are well thought through, and the viewfinder has all the information you need without moving your eye away to make adjustments.
A unique feature of the RX is its DFI or Digital Focus Indicator, an electronic focus confirmation system which visually confirms in the viewfinder the depth of field for your chosen aperture, as well as whether your centre subject is in focus. An easy to read series of electronic dots confirm focus. If the dots are to the left of the centre it's letting you know that you are back-focused. If the electronic dots are to the right of the centre it is letting you know you are forward-focused. My experience thus far is that whilst the focus confirmation is accurate, it is a tad too slow for my style of photography. I mainly shoot portraits and fashion editorials so the approximate 1-2 second lag for the focus confirmation to register is too long. I can see the feature being particularly useful for still life, macro, and product photography though.
Another interesting feature is the data back which prints the time or date in between the frames rather than on the image itself. Perhaps though even Kyocera did not predict the longevity of their cameras because the data-back's date only goes up to 31 December 2019!
Overall, I can see myself using the RX frequently as part of my regular rotation of cameras. The biggest pluses for me are the ergonomics, the bright viewfinder, and of course the ability to natively use Carl Zeiss glass, particularly the heavier lenses which are so well balanced. I would not hesitate to use this on my next professional photoshoot. For long walks or street photography, however, I would leave it at home opting for something smaller and lighter.
Thanks Dom. As I said it has been a bit of a challenge but I'm certain he will enjoy using this camera for many years and hopefully that mirror will stay right where he fixed it. You can see more of Dom's work and follow him on Instagram at refracting_light or on his website at www.refracting-light.com
© All Rights Reserved | Dom Ruikeh 2021


